
Windows to Go for all versions of Windows XP & 7
Windows to Go is a feature allowing you to boot Windows directly from USB media without having to install it on to your internal hard disk. This feature also allows you to carry your installation of Windows on your USB media and use it on any computer.
Unfortunately Microsoft has enabled this feature only for Windows 8 Enterprise Edition.
However there is a way to install all versions on Windows XP and Windows 7 to a USB Flash Drive or an external USB Hard Drive and boot Windows directly from it. This method uses a tool called WinNTSetup created by JFX @ MSFN
How can you make a bootable USB drive?
Hardly any commercial USB drives are suitable from the outset for these diverse tasks. This is because most models are only loaded with a single file system when you first get them, for example, an FAT32 or exFAT file system. They’re missing the “master boot record” (MBR) that’s absolutely necessary for booting most PCs (specifically those with a “basic input/output system” (BIOS)). You have to make a new USB stick bootable on your own.
BIOS (basic input/output system) is a program that is preinstalled on the mainboard of most computers and activates the hardware when the system boots so that the operating system can communicate and interact with it.
A bootable USB drive can of course be created on a different computer than the one you want to use it on later. There are basically two possible methods: either manually or using automated tools. The first option seems a bit complicated at first glance, and because of the various manual steps is slightly more error-prone, but it’s still doable even if you’re not an expert.
Regardless of which option you choose, you always need the following things:
- The Windows utility program DiskPart or an external tool with the same functions.
- A USB drive with at least 4GB of storage (for a 32-bit operating system) or at least 8GB (for a 64-bit system). To obtain a high working speed (or enable the creation of a portable operating system), the selected drive should support the standard USB 3.0. If the drive is already being used, make sure that it doesn’t contain any important or indispensable data.
- An ISO file for the desired operating system that contains all setup files that you need for installation. These files used to be found on a CD- or DVD-ROM, which came with a new computer or could be acquired separately. Today, Windows is generally preinstalled on a system partition of a matching PC or laptop. You can create such an ISO file yourself, though, for example with the use of tools like WinISO, UltraISO, or the burn program InfraRecorder. But it’s simpler to just download the required operating system from the internet. In the case of Windows 10, this can be done completely legally via the media creation tool from Microsoft. Downloading directly from the company’s website is also possible for Windows 7 and Windows 8, for example.
Make a bootable USB drive with the Windows utility program DiskPart
You can simply use the cmd.exe application, better known as “Command Prompt”, to create a bootable USB drive on all operating systems from Windows Vista (including Windows 10). This goes as follows:
- Plug the USB drive into your computer’s USB port.
- Search for the “cmd” application in the Windows start menu, right-click on the item, and select “Run as administrator” from the context menu. This opens a small window with white text on a black background.
- Type the command “diskpart” and confirm your input with the enter key (you’ll also do this after every other entered command). This starts the storage device manager.
- Enter the command “list disk” to display all available storage devices.
- You can recognize your USB by its storage capacity, and it’s usually listed as “disk 1”. In the system partition, “disk 0” is usually your PC, so a hard drive or solid state drive in your computer.
- Based on the assumption that your USB has the label “disk 1”, enter the command “sel disk 1” to select it (or the corresponding “disk 2”, etc.).
- Enter then command “clean” to delete all files from the USB.
- Enter the command “create partition primary” to create a main partition.
- Enter the command “list par” and select the newly created main partition with “sel par 1”.
- Activate the partition with the command “active”.
- Format the USB with the command “format fs=NTFS quick override” (in place of “WINDOWS USB” you can also choose another label, so long as it doesn’t contain any spaces or special characters. The drive will later be displayed under this name if you plug into a running Windows computer). Formatting may take a while. You can track its progress in the percentage bar.
- As soon as the process is finished, enter the command “assign” to automatically assign a drive letter (for example “W:”) to your USB.
- Enter “exit” to close DiskPart, and then “exit” again to close the command prompt.
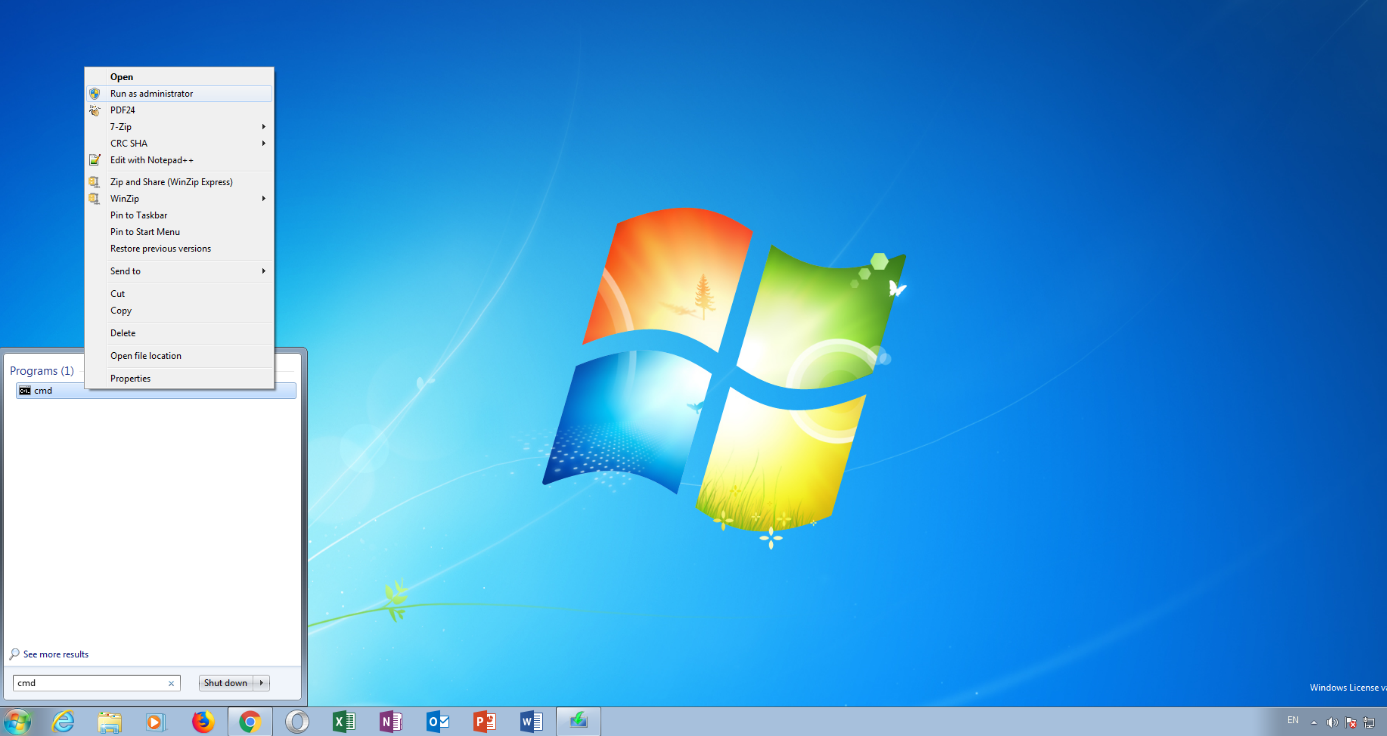
Typing "cmd" in to the Start menu "Run" dialog lets you run "cmd" as Administrator via "right clicking" it
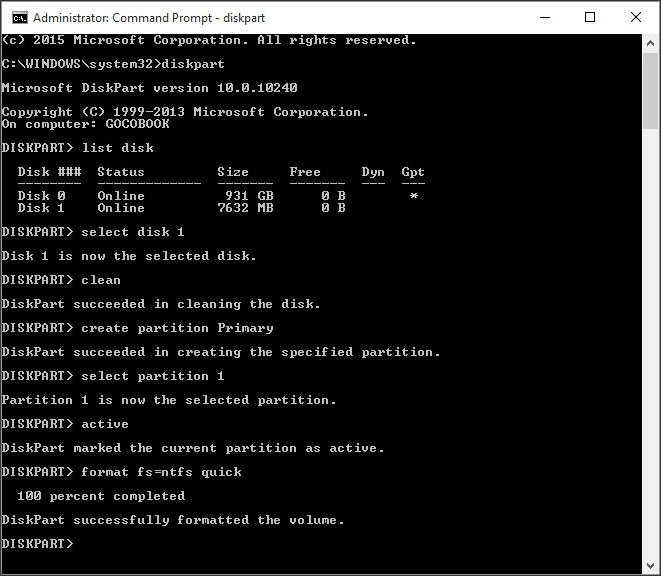
Visual example (note this system has a 1TB HDD. Disk 0, and a 8GB USB drive. Disk 1.
Note: When you start your PC for the first time, the portable Windows will need a bit more time to boot, since the hardware first has to be detected. While it’s being detected, Windows may also restart several times.
After a successful process, you still have to set up your operating system on the USB drive. You can install directly to the drive via the standard setup for embedded versions like XP's "POSREADY2009" & 7's "Thin PC", other versions may require the use of tools such as WinNT Setup, WinToUSB, Etc.
How to Install Windows XP/7 to a bootable USB drive
There are two ways of installing Windows XP/7 to USB Storage Media.
- Format and create a minimum of 16GB partition on your USB Media and Install Windows in this partition.
- Create a Virtual Hard Disk (VHD File) in your USB media and install Windows in this Virtual Hard Disk.
This tutorial describes both ways of installing Windows.
Requirements
- A USB Hard Disk with a minimum of 4GB free space, for XP's "POSREADY2009", OR 8GB free space, for 7's "Thin PC".
- USB 1.x Flash Drives are not recommended.
- A USB 2.0+ USB Flash drive or, better, External HDD/SDD (in a USB 2.0 port) is ideal
- An installation assist application such as WinNTSetup2_x86_x64.zip or WinToUSB
Note: Windows XP/7 ISO. Windows 7 installation ISOs can downloaded directly from Microsoft. I suggest the "Windows 7 Thin PC" version. The Windows XP ISO's can also be found in the Microsoft downloads.
I highly recommend using the 32bit version of Windows as it is more portable
The "POSReady2009" (XP) & "Thin PC" (7) version even more so portable, but both are 32Bit only. Both also tend to boot more reliably across systems then their standard counterparts.
64 bit versions of Windows do not boot on 32bit computers. However 32 bit versions of Windows boot on both 32bit and 64 bit computers.
Enable Windows To Go in Windows 7
With Windows 7 SP1, there is an easier way to install Windows 7 to a USB Hard Disk or USB Flash Drive.
This was discovered by cdob at Reboot http://reboot.pro/topic/14186-usb-hdd-boot-and-windows-7-sp1/?p=127587
It boils down to two registry keys, which are present in Windows 8 to enable Windows To Go feature. This feature was present in Windows 7, but was never activated.
HKLM\System\CurrentControlSet\Control /f /v BootDriverFlags /t REG_DWORD /d 0x6HKLM\System\CurrentControlSet\Control\PnP /f /v PollBootPartitionTimeout /t REG_DWORD /d 15000So inorder to use these new registry settings and install Windows 7 to a USB Hard Disk or Flash Drive, you can use a Tool called WinNTSetup
Install and Boot Window XP/7 to USB Drive
- Insert your Windows installation DVD or mount Windows Installation ISO using ImDisk.

- Download and extract WinNTSetup2_x86_x64.zip. Run WinNTSetup2_x86.exe as Administrator.

- Select the location of the install.wim file – choose the the sources folder in your Windows Installation DVD or mounted ISO. Select location of Boot Drive – Your USB Hard Disk. Select location of the Installation drive – Your USB Hard Disk or VHD Drive.

- You can choose to create a VHD here.
- Choose the Edition of Windows
- Tick Mount Installation Drive as and select C:
- You can also enable some useful settings by clicking on the Tweaks Button.
- Click on Setup and tick Enable Native USB Boot of Windows 7

- It takes some time to install. After installation restart the computer and boot from your USB Hard Disk.
- Windows installation starts up and you have to complete all the installation steps.You will have to boot from your USB Hard Disk if the Windows Installation restarts the computer.
Install and Boot Windows XP/7 from VHD on USB Drive
In Step 3 in the above instructions you can choose to create a Virtual Hard Disk (VHD) on your USB Drive and install Windows to the VHD.
- Click on VHD – Create

- Give a filename for the VHD File and select location as your USB Hard Drive. Enter the desired size of the virtual Hard Disk
Choose Fixed Size(Recommended)
- The VHD will be created and mounted as Z drive.Enter this drive letter in Select location of the Installation drive.

Important notes regarding installing and booting Windows 7 from USB Hard Disk
Installing and booting Windows XP & 7 is not as easy as it is to do with Windows 8. This because Windows 7 does not officially support booting from USB. So the following points have to be kept in mind while installing and booting Windows 7 from a USB Hard Disk.
- Both Windows XP & 7 does not support USB 3.0 out of the box. Hence Windows XP & 7 will have to be booted from a USB 2.0 port.
- Both Windows XP & 7 does not create Pagefile.sys on the USB Hard Disk. If the computer that you are booting has an internal hard disk, then pagefile.sys is created on the internal hard disk. If it does not have an internal hard disk, then Windows will warn you that it cannot create a pagefile as it will not create a pagefile on a ‘removable’ disk. This problem can be overcome by using a Filter Driver like DiskMOD to force Windows to create pagefile.sys on a USB Hard Drive.
- USB Flash Drives are very slow. It takes a long time to install and run Windows from a USB Flash Drive. I highly recommend using a USB Hard Disk.
- Both Windows XP & 7 are not completely portable. You may have activation and driver problems when booting on different computers.
You can make Windows 7 more portable by using the bootable USB Driver stack from Windows Embedded Standard 7 with SP1.
XP's "POSReady2009" & 7's "Thin PC" versions tend to have better reliability booting via USB than their standard counterparts, as they have "embedded" use in mind.
How to start Windows with a bootable USB drive
After its successful creation, you can test your bootable USB drive by using it to start your computer. I suggest the FREE tool, set to 1024mb (max slider in current version 1.3):
Qemu Simple Boot
Remember to test in a USB 2.0 Port
Once you are satisfied with "virtual" testing the next necessary step is to configure target PC's BIOS or UEFI for a possible emergency situation.
To do this, you have to change the boot order in the boot menu:
* Note: Systems will have settings in various "tabs/areas", covering them all would be "near endless", here are generic instructions. Some personal research may be needed for target systems settings if you are unfamiliar with it. I suggest the motherboards user manual.
- Open your computer’s boot menu. Depending on the mainboard manufacturer, this is done by pushing a different key on the keyboard. “Del” is the one most commonly used, but the “F1”, “F2”, “F8”, or “F10” keys can also be used for this function (though rarely any others). Which button you have to push is usually displayed in the margin of the screen as soon as the manufacturer logo appears. But be aware: You only have a short window of time to press the right button. If you miss it, you’ll have to restart your PC and try again.
- If you have a newer PC, it’s possible that UEFI is installed instead of BIOS as firmware. If this is the case, it’s also possible that no button for starting the boot menu will be displayed. Instead, proceed as follows: Click on “Update and recovery” under “System settings”. Then click on “Recovery” and under “Extended start” select “Restart now”. The computer will now be restarted. On the following screen, click on “Troubleshooting”, then “Extended options” and finally on “UEFI firmware settings” to get to the UEFI.
- BIOS and UEFI can look different depending on the computer model and have different names for the individual menu items. Don’t be confused by this, though – the structure is basically the same.
- With the arrow keys, navigate through the BIOS/UEFI. Go to the “Boot” tab (this might also be called “Boot menu”, “Boot manager”, or something similar).
- There, you can select your USB drive so the next system startup will boot from it.
- You can also permanently change the boot order by pushing the [Image↑] or [Image↓] keys to change the order of the boot drives. Set your USB drive on the top of the list to start from it as soon as it’s plugged into your computer.
- Press the [Esc] key to leave BIOS/UEFI.
Comments